

On-page SEO is everything you control on the page itself: the title, the description, the headings, the words, the images and the links. It needs no budget, no outreach and no waiting for other websites. This checklist from Padhaku turns it into a routine: 20 checks in 6 stages, from the keyword you pick before writing to the last look at the page before you publish. Run it on every new post, then work through your older posts one at a time, starting with the ones that already get traffic.
The short answer is this: give every post one clear topic, a title that says what the page is about, a short honest meta description, one main heading, a logical set of subheadings, images with useful alt text, a few links to your own related posts, and a short readable URL. Then check the page on your phone, confirm it is set to be indexed, and publish. None of these steps guarantees a ranking. Google says plainly in its own starter guide that there are no secrets that will automatically rank a site first. Together, though, the checks make a page easy for search engines to understand and easy for readers to use, and that is what on-page SEO is for.
What on-page SEO actually covers
Search engines need to understand what a page is about before they can show it to the right people. On-page SEO is the work that helps them do that, plus the work that helps the reader once they arrive. Google’s SEO Starter Guide puts it simply: SEO is about helping search engines understand your content and helping users find your site and decide whether to visit it. The on-page half of that job lives entirely on your own page, which is why a beginner can do all of it without spending a rupee.
It helps to know where on-page SEO ends, because beginners often mix it up with the other half of SEO. The table below draws the line.
| Part of SEO | What it covers | Who controls it |
|---|---|---|
| On-page SEO | Title, meta description, URL, headings, content, images, internal links, page speed | You, on your own site |
| Off-page SEO | Backlinks from other sites, mentions, reviews, social sharing | Other sites and readers, over time |
This article covers on-page only. Backlinks matter, but they belong to a different job: getting other sites to point at yours. If you are starting out, fix the page first. It is the part you fully control, and it costs nothing. When you are ready for the other half, read our guide to safe ways to build backlinks, which explains what helps and what to avoid. If the terms in this checklist are new to you, start with our complete SEO tutorial for beginners, which explains the basics with practical exercises before this checklist puts them into a routine.
How to use this checklist
Use the checklist in the order it is written. Stages 1 and 2 happen before you write a word. Stages 3 to 5 happen while you write. Stage 6 is the last look before you publish. The first few times it will take half an hour. After that it becomes a five-minute routine, because most of the checks become habits: you will write a clear title and a short slug without thinking about them.
For old posts, do not try to fix everything in one sitting. Find the ten posts that already get the most traffic, which you can see free in Google Search Console, and run the checklist on one or two a week. A post that already ranks a little is the best place to spend the effort, because small fixes there are the most likely to be noticed. The 20 checks are grouped into 6 stages below, and each check says what good looks like and how to verify it. The same 20 checks appear again in one compact table at the end, so you can copy or print that table and tick it off.
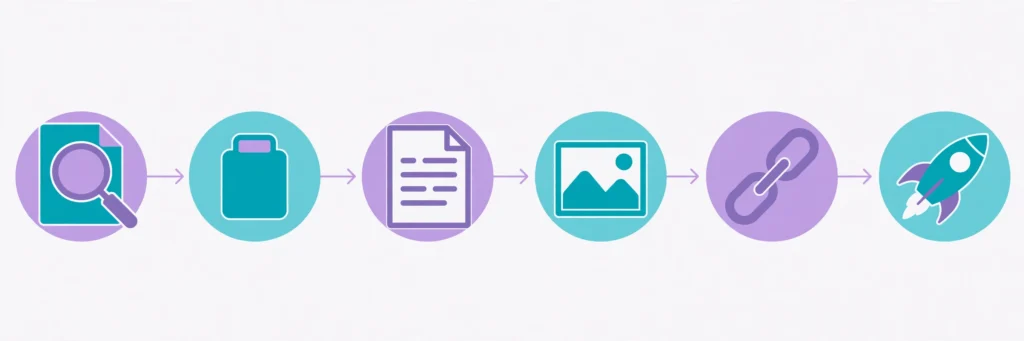
The 20-point on-page SEO checklist
Work through the checks in order. Each one is small on its own. The value is in doing all twenty, every time, so that no post goes out with a missing description, a broken heading structure or an image no one can understand.
Stage 1: Before you write (checks 1 to 3)
- 1. Match the search intent. Search your keyword and read the top results. If they are all step-by-step guides, write a guide, not a product page. If they are all short definitions, a long guide will not match what searchers want. How to check: open a private browser window, search the keyword, and note the format of the top five results.
- 2. Pick one primary keyword per page. Choose one main keyword for the post and do not target the same keyword with another post, or your own pages compete with each other. If your main keyword feels too competitive for a new blog, a longer and more specific phrase is often the realistic target. Read our guide to long-tail keywords for how to pick one. How to check: keep a simple list of each keyword and the post it belongs to, and look at it before you start writing.
- 3. Know the question the post answers. Write the reader’s question in one sentence before you write anything. If you cannot, the post has no clear job yet. Free keyword research tools can show you the words people actually type, which is often different from the words you would guess. How to check: read the first paragraph after drafting. It should answer that question directly.
Stage 2: Title, meta description and URL (checks 4 to 6)
- 4. Write a clear title tag. A good title is unique to the page, clear and concise, and accurately describes the contents of the page. That is Google’s own advice. A practical target used by most checklists is around 50 to 60 characters, so the full title shows in search results, with the main topic near the start. Do not stuff several keywords in a row. How to check: look at the title in your SEO plugin’s search preview. If it is cut off, shorten it from the end.
- 5. Write a short meta description. A good meta description is short, unique to one particular page, and includes the most relevant points of the page. Aim for 140 to 160 characters and say what the page actually delivers. Google sometimes writes its own snippet from the page text instead, so treat the description as an invitation, not a guarantee. Never copy the first sentence of the article as the description. How to check: count the characters in the meta field, and ask whether it promises something the page really delivers.
- 6. Keep the slug short and readable. Use a short slug in lowercase words separated by hyphens, with no dates and no random numbers. A reader should understand the topic from the URL alone. Google’s guide says the same thing: include words in the URL that may be useful to users, because a URL with only random identifiers helps nobody. How to check: read the URL out loud. If it needs explaining, shorten it. Do not change the slug of a post that is already published, because old links to it will break.
Stage 3: Headings and content (checks 7 to 11)
- 7. Use exactly one H1 that matches the title. A page should have one main heading, and it should match the title closely. In WordPress the post title is usually the H1 already, so do not add another H1 inside the body. Two main headings confuse both readers and screen readers. How to check: view the page source and search for h1, or use the editor’s document outline, and confirm there is only one.
- 8. Build a logical H2 and H3 outline. Use H2 headings for the main sections and H3 headings for subsections, in order. Headings are for structure, not for making text look bigger. Google says heading order does not decide rankings, but a clear outline helps readers find their way and helps screen readers. How to check: read only the headings. They should tell the story of the post on their own.
- 9. Answer the question in the first 100 words. Give the direct answer early, then go deeper. Readers who have to hunt for the answer leave, and a search engine that cannot see the answer quickly has less to work with. How to check: read the first paragraph on its own. If it does not answer the reader’s question, rewrite it before anything else.
- 10. Use the keyword naturally, never stuffed. Use the primary keyword in the title, the first paragraph and one subheading, then write naturally. Repeating the same phrase over and over is keyword stuffing, and Google lists it as against its spam policies. There is no percentage to aim for. How to check: read the post out loud. If a phrase sounds repeated, it is.
- 11. Make the content genuinely useful and original. Cover the topic in your own words and add something a reader cannot get from the first result: a worked example, a checklist, a comparison, or your own steps. Google’s guide says to create the content yourself and not to rehash what others have already published. How to check: ask one reader to say what they can do after reading that they could not do before. If they cannot name anything, the post needs more substance.
Stage 4: Images (checks 12 to 14)
- 12. Use sharp images near relevant text. Use clear images and place each one next to the text it illustrates. Google’s guide says the text near an image helps it understand what the image is about, so an image dropped far from its section helps nobody. How to check: open the post and confirm every image sits beside the section it belongs to.
- 13. Give image files descriptive names. Name the file for what it shows, for example on-page-seo-checklist-featured.webp, instead of uploading IMG_4821.jpg. A descriptive name is a small extra signal, and it makes your media library searchable later. How to check: rename the file before you upload it, because WordPress keeps the name you upload.
- 14. Write short descriptive alt text for every image. Alt text is a short piece of text that explains what the image shows and how it relates to your content. Describe the image in one sentence. Do not paste a list of keywords into it, and leave alt text empty only for images that are purely decorative. How to check: fill in the alt text field for every image in the media library before you insert it.
Stage 5: Links (checks 15 to 17)
- 15. Add three to five contextual internal links. Link to your own related posts where a reader would naturally want more, using anchor text that describes the destination. Three to five links is a practical target for a long post. Never use “click here” as the anchor text, because it tells nobody, reader or search engine, where the link goes. How to check: count the internal links, and confirm each one sits inside a sentence that explains why the reader should follow it.
- 16. Make every important page reachable by links. Google finds most new pages through links from pages it already knows, so a post that nothing links to is hard to discover. Link new posts from older related posts and from a category or hub page, so a reader can reach any post in two or three clicks from your homepage. How to check: click through from your homepage and category pages and try to reach the post without using search.
- 17. Link out only to sources you trust. Link to other sites when a claim needs a source, and point at the official page. Google’s guide says that if you cannot trust a source and still want to link to it, you should add a nofollow attribute so search engines do not associate your site with it. How to check: click every external link once before publishing, and confirm it opens the page you meant.
Stage 6: Before you hit publish (checks 18 to 20)
- 18. Confirm the canonical and the index setting. The canonical URL should point at the post’s own address, and the post should be set to be indexed. A stray noindex on a post you want found is a silent failure: the page exists, but search engines are told to ignore it. In Rank Math, both settings sit on the post itself, under the Advanced tab. How to check: open the Rank Math settings for the post before scheduling and read both fields.
- 19. Read the post on a phone. Most readers in India arrive on a phone. Check that headings, tables and images fit the screen, that nothing overflows sideways, and that the text is readable without zooming. How to check: open the preview on your own phone, or use the editor’s mobile preview, and scroll through the whole post.
- 20. Check the speed, then publish and wait. Open the post in PageSpeed Insights and fix the biggest problem it reports. For a beginner’s blog that is usually oversized images. Then publish and give it time. Google says some changes show in hours and others take months, so wait a few weeks before judging whether the post is working. How to check: run PageSpeed Insights once. Do not chase a perfect score.
The 20-point checklist in one table
Copy this table or print the page and tick each row before you publish. It is the same 20 checks as above, in short form.
| # | Check | Done |
|---|---|---|
| 1 | Search intent matches the top results | |
| 2 | One primary keyword for this post only | |
| 3 | Reader’s question written in one sentence | |
| 4 | Title unique, clear, around 50 to 60 characters | |
| 5 | Meta description short, unique, 140 to 160 characters | |
| 6 | Slug short, lowercase, hyphenated, no dates | |
| 7 | Exactly one H1, matching the title | |
| 8 | Logical H2 and H3 outline | |
| 9 | Direct answer in the first 100 words | |
| 10 | Keyword used naturally, never stuffed | |
| 11 | Content useful and original, not copied | |
| 12 | Sharp images placed near relevant text | |
| 13 | Image files named descriptively | |
| 14 | Short descriptive alt text on every image | |
| 15 | Three to five contextual internal links | |
| 16 | Post reachable by links from the rest of the site | |
| 17 | External links only to trusted sources, checked | |
| 18 | Canonical is the post itself, set to index | |
| 19 | Post read through on a phone | |
| 20 | Speed checked, then publish and wait |
A worked example: one post, before and after
This is a hypothetical example for illustration only. The blogger, the blog and the details are made up, and actual results will differ. It shows how the checks fit together on a single real-looking post.
Neha runs a small food blog from Jaipur. Her next post is a collection of paneer recipes for people who cook after work. Before the checklist, her draft looks like this: the title is “Paneer Recipes”, the meta description is the first sentence of the post, the slug is “paneer-recipes-2026-final”, the images are named IMG_1142.jpg with no alt text, and the post links to nothing. Each of those is a small problem on its own. Together they mean a search engine has very little to work with, and a reader arriving from search has no clear reason to stay.
| Element | Before | After the checklist |
|---|---|---|
| Title | Paneer Recipes | 5 Easy Paneer Recipes for Busy Weekdays |
| Meta description | First sentence of the post, copied automatically | Five paneer recipes you can finish in 30 minutes, with ingredients you already have at home. (108 characters, written for this post only) |
| Slug | paneer-recipes-2026-final | easy-paneer-recipes-weekdays |
| H1 | Missing, because the title was set as plain text | 5 Easy Paneer Recipes for Busy Weekdays, matching the title |
| First paragraph | A long story about how she learned to cook | Five paneer recipes, each ready in about 30 minutes, with a shopping list at the end |
| Image alt text | Empty | A plate of paneer butter masala with roti, served on a steel thali |
| Internal links | None | Three links: her guide to storing paneer, her weeknight dinner plan, and her pressure cooker basics post |
Notice what the example does not do. It does not promise a ranking, a traffic number, or a date by which results will appear. What it does is give the post a fair chance: a reader can tell from the search result what the post offers, and a search engine can tell what the page is about. That is all a checklist can honestly offer, and it is enough to be worth doing every time.
7 mistakes that undo good on-page SEO
Most on-page problems are not caused by missing knowledge. They are caused by habits that feel harmless. These seven are the ones beginners repeat most often.
| Mistake | What happens | Do this instead |
|---|---|---|
| Stuffing the keyword into every paragraph | The text reads badly, and Google lists keyword stuffing as against its spam policies | Use the keyword in the title, the intro and one heading, then write naturally |
| Using the same meta description on every post | Every search result looks identical, and Google may ignore the description entirely | Write one description per post, about that post only |
| Using headings to make text bigger | The page outline breaks, which confuses screen readers and readers who skim | Use H2 and H3 for structure only, and style text another way |
| “Click here” as anchor text | Nobody, reader or search engine, learns where the link goes | Describe the destination in the anchor text |
| Images with no alt text, or alt text full of keywords | The image adds no context, and keyword-stuffed alt text looks like spam | Describe the image in one short sentence |
| Publishing without a mobile check | Tables overflow, images break the layout, and readers leave | Preview every post on a phone before publishing |
| Changing the slug after publishing | Old links break and the post’s history splits across two addresses | Set the slug once, before publishing, and leave it alone |
Free tools that check each item
You do not need a paid SEO tool to run this checklist. The free tools below cover every check, and all of them are made by Google or built into WordPress.
| What to check | Free tool | What it tells you |
|---|---|---|
| Whether Google found the page | Google Search Console, URL Inspection tool | Whether the page is indexed and how Google sees it |
| What people searched to find your site | Google Search Console, Performance report | The actual queries and the pages they led to |
| Speed on mobile and desktop | PageSpeed Insights | What slows the page down and what to fix first |
| Title, meta description and keyphrase fields | Rank Math, or your own SEO plugin | Whether each field is filled in, and how the result may look in search |
| The page on a phone | WordPress editor preview, or your own phone | Overflow, readability and image size on a small screen |
| Whether a page is listed at all | Google search with the site: operator | Searching site:yourdomain.com shows the pages Google lists for your site |
What this checklist cannot promise
Honesty matters more than optimism here, because SEO is full of promises that no checklist can keep. Google’s own guide says there are no secrets that will automatically rank a site first, and that some changes take hours to show while others take months. A checklist can make a page understandable and usable. It cannot force a ranking, a number of visitors, or a date by which results arrive.
Three more limits are worth knowing. First, there is no magic word count. Google says the length of the content alone does not matter for ranking, so do not pad a post to reach a number. Second, a meta description is not a ranking signal. Its job is to earn the click, and Google may write its own snippet from your page text instead. Third, E-E-A-T, the experience, expertise, authoritativeness and trustworthiness idea that many guides quote, is not a ranking factor. Google says so directly in the same guide. For more claims that sound true but are not, read our guide to common SEO myths.
None of this means on-page SEO is pointless. It means the work is quieter than the promises: a page that is clear, fast, honest and easy to use will do better over time than a page that is not, and the checklist is how you make sure of that before every publish.
Frequently asked questions
Should I redo my old posts with this checklist?
Yes, but start with the posts that already get the most traffic, which you can find in Google Search Console. Fix one or two a week. Do not rewrite a post that already works well just to tick boxes on a checklist. The goal is to fix what is broken or missing, not to rebuild what is already fine.
How long before I see results?
There is no fixed answer. Google says some changes take effect in a few hours and others take several months, and recommends waiting a few weeks before judging whether a change helped. A new post on a new blog will usually take longer than a fix to a post that already gets traffic. Judge a change after weeks, not after a day.
Does the meta description affect rankings?
Not directly. A meta description is not a ranking signal, and Google may write its own snippet from your page text instead. Its job is to earn the click: a clear description that matches what the page delivers can bring more visitors even if the position stays the same. That is reason enough to write one for every post.
Is keyword density still a thing?
No. There is no percentage to aim for, and Google warns against repeating the same words over and over. Use the keyword where it belongs, in the title, the first paragraph and one subheading, and then write naturally. If the post reads well to a person, the keyword question is usually settled.
Should every post target a different keyword?
Yes, one primary keyword per post. If two of your posts target the same phrase, they compete with each other, and neither gets the full benefit. Pick the stronger post for that keyword and point the other one at a different angle, or merge the weaker post into the stronger one and redirect it.
What to do next
Pick your next post and run this checklist on it before you publish. Then pick your most-visited old post and run the same 20 checks on it. Two posts a week is a realistic pace for a beginner, and it is better than fixing twenty posts in one weekend and never looking at them again. For more free learning material, visit Padhaku’s free resources page, and keep the summary table above saved somewhere you will actually see it before you hit publish.
About Padhaku
Padhaku is an India-focused digital skills learning platform founded by Anubhav Shukla. It focuses on making practical digital education more accessible to learners. This guide is part of a series that explains SEO in plain language, with honest limits and no promises of guaranteed rankings or income.
Sources and further reading
- Google Search Central, “SEO Starter Guide: The Basics”, read 22 November 2026: developers.google.com/search/docs/fundamentals/seo-starter-guide
- Google Search Console, free tool for checking indexing and search performance: search.google.com/search-console/about
- Google PageSpeed Insights, free speed check for any page: pagespeed.web.dev
Checked 22 November 2026. Google updates its guides and tools, so check the official pages for the current version before you rely on any single detail in this checklist.